Quick & Simple Microwave Caramels: Your Secret Weapon for Holiday Gifting
The holiday season often brings with it a delightful dilemma: how to create thoughtful, homemade gifts without adding undue stress to an already packed schedule. Enter the humble yet mighty
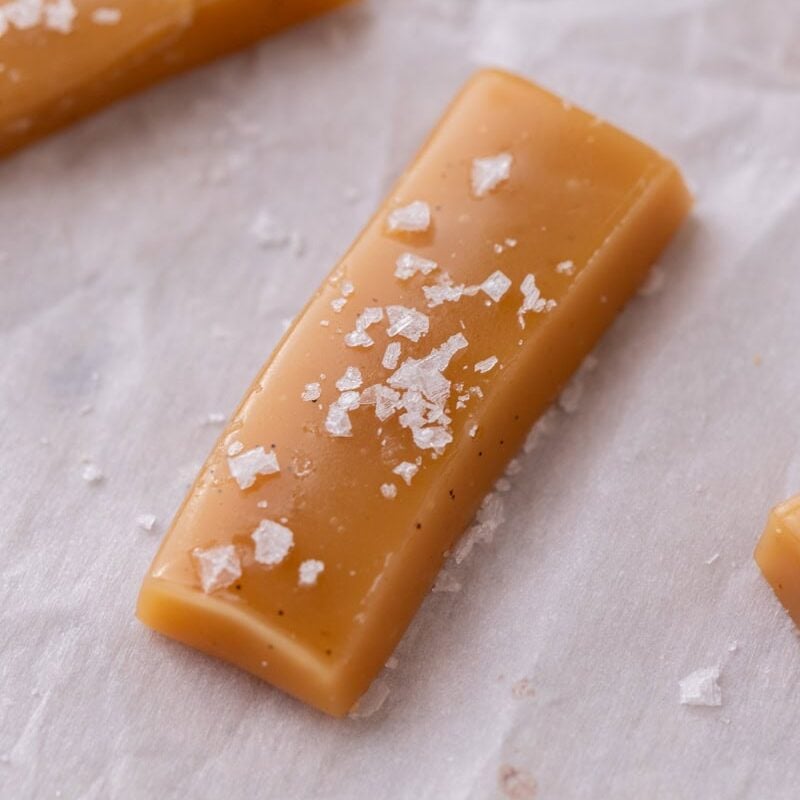
microwave caramels – a game-changer for anyone craving the joy of homemade candy without the fuss. Imagine soft, chewy, utterly buttery confections, kissed with a sprinkle of sea salt, ready in mere minutes with just a handful of pantry staples. These aren't just easy caramels; they're your new go-to for impressive, heartfelt holiday gifting.
Forget the intimidating candy thermometer, the constant stovetop stirring, and the fear of crystallization. This revolutionary method leverages the power of your microwave to transform simple ingredients into luscious, old-fashioned tasting caramels that will fool even the most discerning palate. Whether you're a seasoned baker or a complete novice, these foolproof microwave caramels promise maximum payoff with minimal effort, making them ideal for festive treats, party trays, or delightful additions to your holiday cookie boxes.
Why Microwave Caramels Are Your Holiday Gifting Secret Weapon
The appeal of homemade gifts lies in their personal touch, but the reality of holiday preparations can often deter even the most enthusiastic gift-giver. This is where the magic of microwave caramels truly shines, offering a solution that is both practical and profoundly satisfying.
No Stress, Just Sweet Success
Traditional caramel making can be a finicky process, often requiring precise temperatures and constant attention to prevent burning or sugar crystallization. Our microwave caramels completely bypass these hurdles. Everything comes together in a single large microwave-safe bowl, cooked in short intervals with a quick stir in between. This means no sticky stovetop messes, no complex techniques, and absolutely
no candy thermometer required. This streamlined approach makes homemade candy accessible to everyone, ensuring a stress-free experience even during the busiest Decembers. The sheer simplicity makes these the ideal recipe if you want to create beautiful, delicious homemade candy without the pressure, resulting in a perfectly soft and chewy texture every time.
Simple Pantry Staples, Gourmet Results
One of the most appealing aspects of these easy microwave caramels is their reliance on everyday ingredients you likely already have on hand. A blend of butter, granulated sugar, brown sugar, light corn syrup, and sweetened condensed milk forms the foundation of these delectable treats. Each ingredient plays a crucial role: the sugars provide sweetness and structure, butter adds richness and tenderness, light corn syrup acts as a natural anti-crystallization agent, ensuring a smooth texture, and sweetened condensed milk delivers that signature creamy, chewy consistency we all love in a classic caramel. Together, these humble components melt into a gloriously smooth, glossy caramel mixture that tastes anything but "quick."
Versatility in Gifting & Enjoyment
Once cooled and cut into perfect squares, these homemade caramels are incredibly versatile. A sprinkle of flaky sea salt elevates them to a gourmet level, balancing the sweetness with a touch of savory. But the possibilities don't end there! These caramels are perfect for:
*
Elegant Gifting: Package them in decorative tins, clear cellophane bags tied with festive ribbons, or small boxes.
*
Holiday Dessert Trays: Add them to your assortment of cookies and other confections for a professional-looking spread.
*
Cookie Boxes: Tuck a few into your holiday cookie boxes for an extra special treat.
*
Personalization: Dip them in melted chocolate, sprinkle with chopped nuts (pecans, walnuts, or almonds work wonderfully), or even add a dash of vanilla bean paste or a hint of cinnamon for unique flavor profiles.
This recipe truly feels like the perfect choice for the holiday season – minimal effort, maximum payoff, and endless opportunities for personal touches.
The Magic Behind the Microwave: How It Works So Well
Understanding the science behind these microwave caramels makes the process even more fascinating and ensures consistent results. The method relies on controlled, even heating and specific ingredient interactions to achieve that coveted soft, chewy texture.
Core Ingredients & Their Functions
*
Butter & Sugars (Granulated & Brown): These are the base for flavor and sweetness. Brown sugar adds a deeper, molasses-rich note characteristic of traditional caramels.
*
Light Corn Syrup: This is the unsung hero! Corn syrup is an invert sugar that prevents the other sugars from crystallizing, which is often the biggest hurdle in homemade candy making. It ensures your caramels remain silky smooth and not grainy.
*
Sweetened Condensed Milk: Crucial for creaminess and chewiness. It adds body and a rich, milky flavor that enhances the overall caramel experience.
Microwaving in Intervals for Perfection
The key to success with
foolproof soft & chewy microwave caramels in minutes is cooking them in measured intervals. This prevents the mixture from overheating too quickly and burning, allowing for even cooking. Typically, the mixture is microwaved for a few minutes, stirred thoroughly, and then microwaved again in shorter bursts, with stirring in between. This continuous process ensures that all ingredients melt and combine uniformly, developing that deep caramel flavor without scorching.
No Thermometer? No Problem! The Soft-Ball Test
While some might swear by a candy thermometer, this recipe champions simplicity through the "soft-ball test." This classic method involves dropping a small amount of the hot caramel mixture into a cup of cold water. If it forms a soft, pliable ball that can be flattened between your fingers, it’s done. This indicates that the sugar concentration and moisture content are just right for a perfectly soft and chewy caramel. It's a reliable, old-fashioned technique that eliminates the need for special equipment.
Once the soft-ball stage is reached, the glistening caramel mixture is carefully poured into an 8-inch pan lined with parchment paper. This preparation step is vital for easy removal and clean cutting later. A final sprinkle of sea salt before cooling adds that irresistible finishing touch, enhancing the sweetness and complexity of the flavor profile.
Elevating Your Microwave Caramels: Tips for Perfection & Personalization
While the basic recipe is wonderfully straightforward, a few extra tips can elevate your microwave caramels from great to extraordinary, and open up a world of customization.
*
Proper Cooling is Paramount: Resist the urge to cut into your caramels too soon! Allow them to cool completely at room temperature for several hours, or even overnight. Rushing this step can result in sticky, misshapen pieces. For faster setting, you can place them in the refrigerator after they've cooled sufficiently at room temperature for an hour or two.
*
Sharp Knife for Clean Cuts: Once fully set, use a sharp, lightly oiled knife to cut the caramels into uniform squares. Wiping the knife blade clean periodically will prevent sticking.
*
Storage Savvy: Store your finished caramels in an airtight container at room temperature. They will keep well for several weeks, making them perfect for preparing ahead of holiday events. If stacking them, you might want to separate layers with parchment paper to prevent sticking. For longer storage, they can also be frozen for up to a few months.
*
Flavorful Additions: Don't limit yourself to sea salt!
*
Extracts: A teaspoon of pure vanilla extract added at the very end (after microwaving, before pouring) can deepen the flavor. Consider almond extract for a subtle nutty note.
*
Spices: A pinch of cinnamon or nutmeg can add a festive warmth, especially if gifting around Christmas.
*
Chocolate Dip: For an indulgent twist, melt some good quality chocolate (dark, milk, or white) and dip half or all of the cooled caramel squares. Sprinkle with extra sea salt or chopped nuts before the chocolate sets.
*
Nuts: Fold in toasted pecans, walnuts, or almonds into the caramel mixture just before pouring it into the pan.
*
Gifting Presentation: Beyond simply bagging them, consider wrapping individual caramels in small squares of wax paper or parchment paper for a classic, professional look. Combine them with other homemade treats like shortbread cookies or fudge in a beautiful gift basket.
Beyond Gifting: Other Ways to Enjoy Your Homemade Caramels
While these microwave caramels are indeed perfect for gifting, don't forget to save some for yourself! They are an ideal treat for:
* **Everyday Snacking:** Keep a stash for when a sweet craving strikes.
* **Dessert Topping:** Gently melt a few caramels with a splash of cream to create an instant caramel sauce for ice cream, apple pie, or brownies.
* **Holiday Dessert Trays:** A beautiful addition to any festive spread.
* **S'mores Upgrade:** Replace traditional chocolate with a square of caramel for a gooey, elevated s'more experience.
Conclusion
Making delicious, homemade caramels doesn't have to be a daunting task. With the simple, stress-free method of microwave caramels, you can whip up batch after batch of soft, chewy, buttery confections that taste like they took hours to make. Perfect for holiday gifting, a delightful treat for your own family, or an impressive addition to any party spread, these quick and easy caramels prove that sometimes, the simplest methods yield the most extraordinary results. So, grab your microwave-safe bowl, gather your ingredients, and get ready to create some sweet holiday magic!